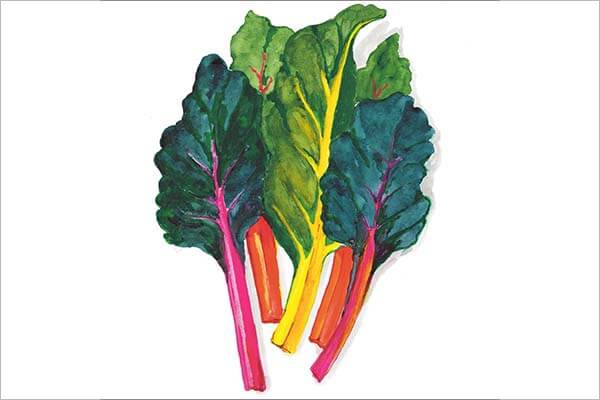
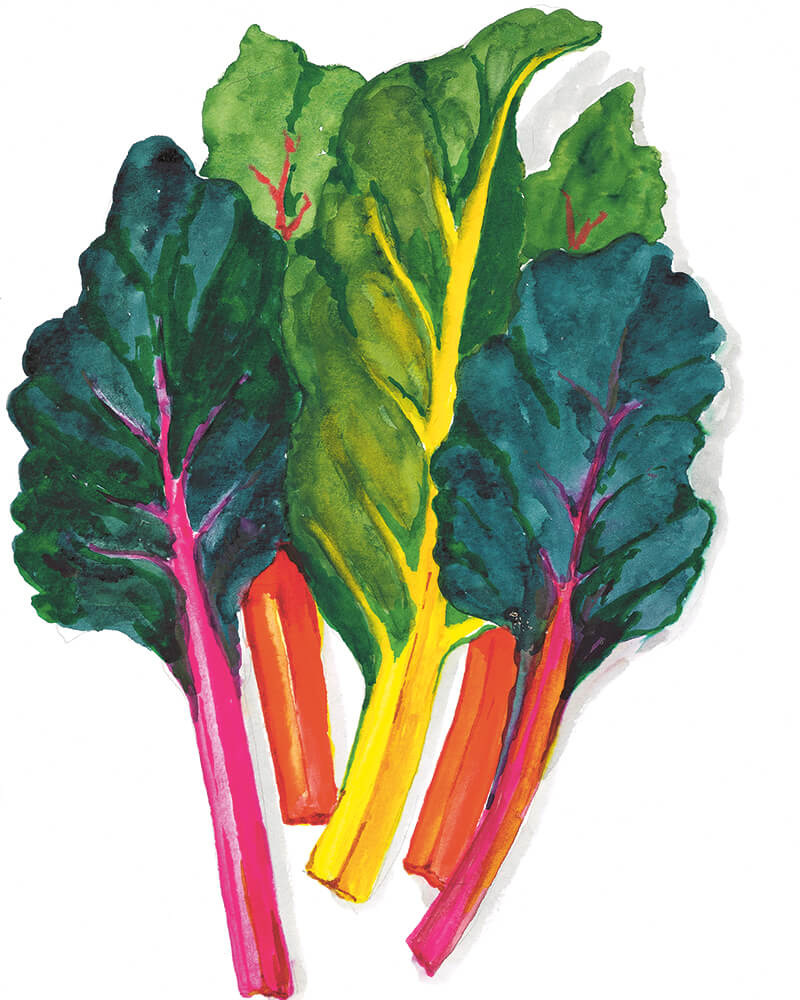
Rainbow chard (also known as silverbeet) is frost tolerant and can be sown all year round, making it a perfect choice for those in the southern hemisphere unsure where to start with their own kitchen garden.
Read on for a recipe for pickled rainbow chard from The Kitchen Garden by Lucy Mora.
Image: rainbow chard (also known as silverbeet). Illustration by Lucy Mora.
Pickled Rainbow Chard
Makes 2-3 medium preserving jars
Method
Pack washed chard into sterilised glass jars along with dill and garlic.
Put 250 ml (1 cup) of water in a medium saucepan and add vinegar, peppercorns, mustard seeds, chilli flakes, salt and sugar. Bring to a boil and simmer until sugar and salt has dissolved.
Carefully pour the hot brine over the chard. Let jars cool to room temperature.
Seal jars and refrigerate for at least 3 hours before serving. Use within 3 months.
Winter gardening is a good time to see the bare bones and rethink certain parts of your garden. There are always a few hours in the day that are enjoyable to be out in the garden in winter, but the nicest part is taking your boots off and coming in to sit in front of the fire.
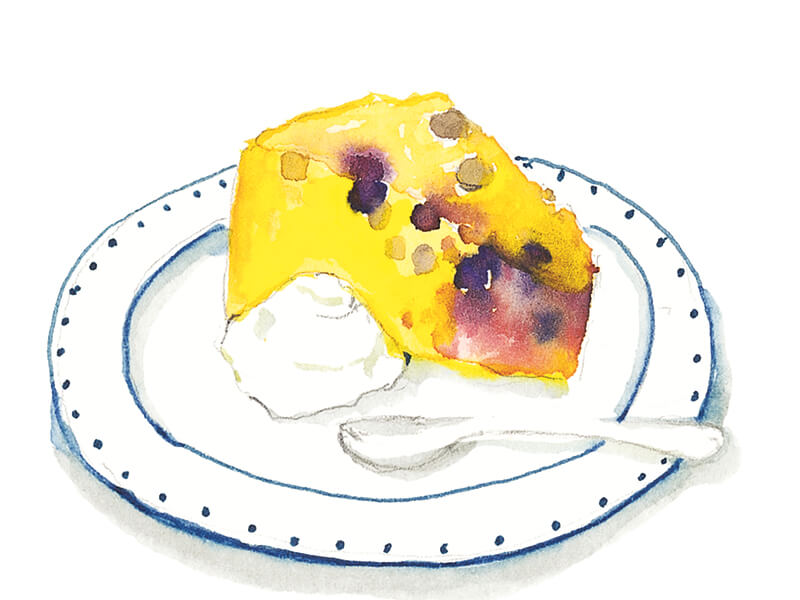
Read on for an extract from The Kitchen Garden by Lucy Mora to find out how you can grow your own blueberries this winter (plus a delightful blueberry and almond cake recipe to make with them).
Blueberries
Sow winter, spring
Harvest summer, autumn
Growing time 8-10 weeks
Space between plants 75 cm
Pots yes
Aspect full sun
Soil pH 4.0-5.0
Frost tolerant yes
Companions basil, thyme, rhubarb
Dislikes Blueberries prefer an acidic soil, so any plants that like a pH above 6 won’t be a good companion.
Varieties Brightwell – sweet, high yield Sharpblue – high yield Bluecrop – deciduous, sweet
Sow Plant in the winter for a summer crop, spacing plants around 75 cm apart. While blueberries are self-fertile, co-planting more than one variety will help improve pollination and yield. You can buy blueberries in pots.
Test your soil to check the soil acidity. Blueberries need a pH reading between 4 and 5. If it is higher than that, add granular sulphur to the soil (this is best added a few months prior to planting). Till into the soil and water in. Used coffee grounds are a good addition. Add compost and manure and use mulch to cover.
Nurture Feed your blueberries in spring with an azalea fertiliser. Keep your patch well-watered. Remove any dead or diseased branches before the plant comes into leaf in spring. Reduce all the branches by a third to do two-thirds if it has reached its full height (usually after 4 years).
Harvest Leave fruit until fully ripe, as it won’t continue to ripen once picked.
Blueberry and Almond Cake
Preheat the oven to 180°C. Grease and line a 22 cm cake tin.
Mix dry ingredients in a mixing bowl with a whisk.
In a separate bowl, beat together the sugar and eggs with an electric beater on medium for five minutes until the mixture becomes pale and increases in volume. While the mixer is still running slowly, pour in the melted butter and oil. Add the almond extract. It should look thick and glossy.
Bake for 35-40 mins. Poke a skewer into the cake and if it comes out clean it’s ready.
Let the cake cool before turning it out into a cake plate. Dust with icing sugar and serve with thick cream.
For 8
4 eggs, lightly beaten
200 g sugar
50 g vegetable oil
70 g butter, melted
1 tsp almond extract
375 g blueberries (you can use frozen)
Icing sugar (for dusting)
Thick cream to serve (optional)
Dry ingredients
175 g almond flour
85 g all-purpose flour
1/2 tsp baking powder
1/2 tsp salt
This is an edited extract from The Kitchen Garden by Lucy Mora.
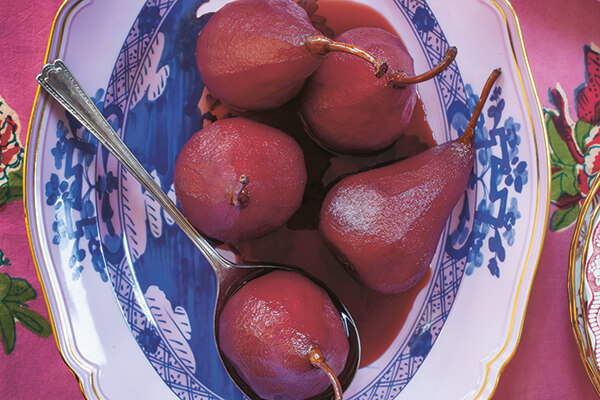
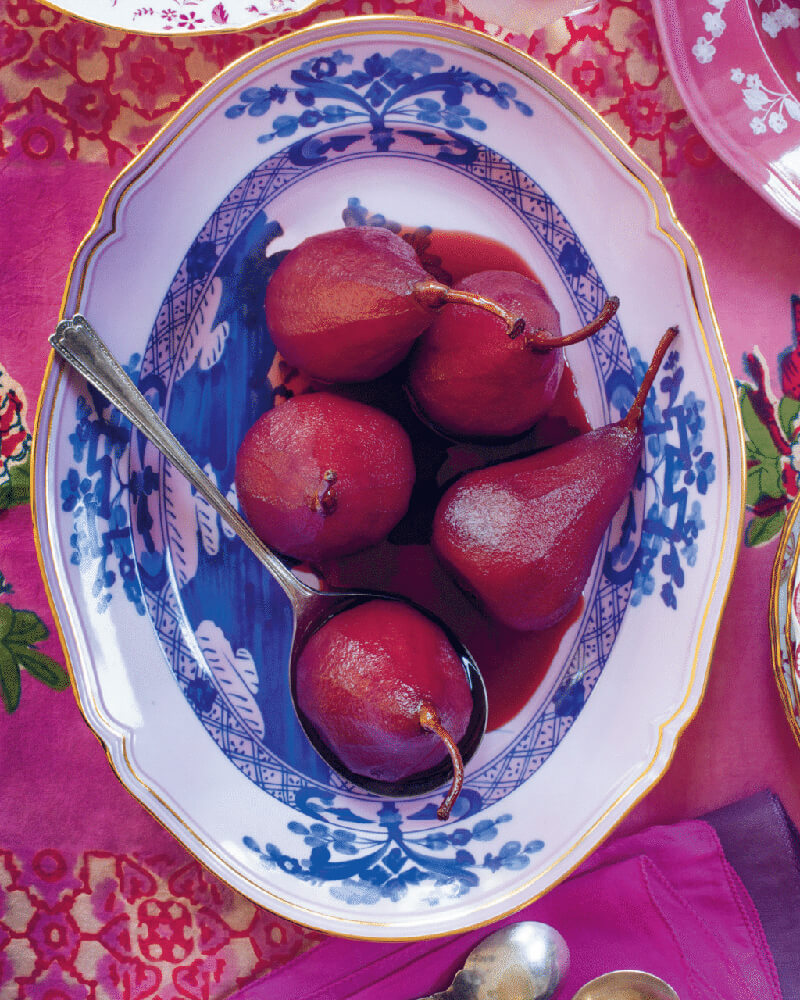
My mother always made these poached pears on cold winter nights. I love to serve them following a heavy meal – the fruit provides a sweet and mellow finale to a feast, while the red wine sauce makes this a robust and comforting winter dessert.
Serves 6
Juice of 2 lemons 6 pears, ripe but firm 1 bottle hearty red wine 300 g brown sugar Juice of 2 oranges Seeds from 20 g cardamom pods (crack the pods to remove the seeds) 2 bay leaves Crème fraîche, double cream or vanilla ice cream, to serve
Preparation: 10 minutes
Cooking: 40 minutes
Add half the lemon juice to a bowl large enough to hold all the pears.
Put 200 ml water and all the ingredients except for the pears into a large pan. Gradually bring to the boil over a medium heat, stirring to ensure that the sugar dissolves completely. Once the poaching liquid is boiling, reduce the heat and allow to gently bubble away for 5 minutes, so that the alcohol evaporates.
Peel the pears (leaving the stems on), and trim 5 mm from the bottom of each one so that it can stand up. Put each prepared pear in the bowl of lemon juice as you go, coating it in the juice to stop it turning brown.
Holding each one by its stem, gently lower the pears into the poaching liquid, then add the bowlful of lemon juice and bring the liquid to a simmer. Cover the pears with a sheet of baking parchment, pushing it down flat to the level of the liquid and pears. Simmer for 20 minutes. Remove the parchment paper and transfer the cooked pears to a plate, standing them upright on their trimmed base. Set to one side.
Continue to simmer the poaching liquid, uncovered, for another 15 minutes, or until the liquid has reduced by half. Strain the poaching liquid through a sieve, discarding the cardamon seeds and bay leaves, and then return it to the pan. Add the pears to the pan and coat them in the thickened sauce.
Serve the pears warm. Place a tablespoon of your cream of choice in the centre of each serving bowl, before standing the pear on the dollop and drizzling with some of the sauce.
The Vegan Cake Bible teaches you everything you need to know about making incredible plant-based cakes. In this easy-to-follow book, author, pastry chef and vegan cake queen, Sara Kidd, shares her vast knowledge of the science behind vegan baking and how to make foolproof creations every time.
Read on for Sara’s vegan recipe for a Persian Love Cake.
Image: Sara Kidd
Legend has it that a Persian woman wanted to make a prince fall in love with her, so she created a cake laced with a love spell. I think it worked because every bite of this Persian love cake brings romance. Aromas of cardamom and rose are kissed with a tender almond cake crumb and the surprise of pistachios. It’s truly a cake for lovers. It will fill you with desire and maybe wanting a little more … cake.
PERSIAN LOVE CAKE
Makes 1 x 20 cm (8 in) single-layer cake Serves 12
170 g (3/4
cup) caster (superfine) sugar
60 ml (1/4
cup) rosewater
1 teaspoon
vanilla bean paste
1 teaspoon
lemon extract or flavouring
zest of 1
unwaxed lemon plus 2 tablespoons of juice
80 ml (1/3
cup) plain soy milk
1
tablespoon white vinegar
200 g (11/3
cups) plain
(all-purpose) flour
11/2
teaspoons baking powder
1/2
teaspoon bicarbonate of soda (baking soda)
1/2
teaspoon sea salt
1/2
teaspoon xanthan gum
1
tablespoon ground cardamom
55 g (1/2
cup) blanched almond flour
125 g (1
cup) icing (confectioners’) sugar
chopped pistachios and dried rose petals, to decorate
Prep time: 20 mins
Bake
time: 35–37 mins
Decoration
time: 10 mins
Skill: Easy
Method: Mixing
Sweetness: Medium but with a hint of spice
Texture: Soft crumb
1 ⁄ Preheat the oven to 170°C (340°F)
conventional. Grease and line a 20 cm (8 in) springform cake tin with baking
paper, then grease again and dust with flour, tipping out the excess.
2 ⁄ Melt the butter in a heatproof bowl
in the microwave on High in 10-second bursts.
3 ⁄ Transfer the melted butter to a
bowl, add the caster sugar and whisk until the sugar is dissolved. Add 3
tablespoons of the rosewater, the vanilla bean paste, lemon extract and lemon
zest and stir until completely combined.
4 ⁄ In a separate small bowl, stir the
soy milk and vinegar together until the mixture thickens, then add to the
melted butter mixture, stirring to combine.
5 ⁄ Sift the flour, baking powder,
bicarb soda, salt, xanthan gum and ground cardamom into a large mixing bowl,
then stir in the almond flour.
6 ⁄ Make a well in the centre of the
dry ingredients and pour in the wet mixture. Stir until just combined.
7 ⁄ Pour the batter into the prepared cake tin, then transfer to the middle rack of your oven and bake for 35–37 minutes, until golden brown and the top springs back when gently pressed.
8 ⁄ Allow the cake to cool in the tin
for at least 15 minutes, then turn out onto a cake rack to cool completely.
9 ⁄ To make the glaze topping, place
the icing sugar, lemon juice and remaining rosewater in a bowl and stir until
completely combined.
10 ⁄ Pour the glaze over the cooled cake and decorate with pistachios and dried rose petals, as desired.
Baker’s
tip: You can
add less cardamom if you’re not a fan of this spice.
Salads are so versatile: healthy and inexpensive meals that can be thrown together using endless combinations of ingredients and a little creativity.
Dressed up or pared back, a salad can be as simple as tossing a few green leaves in a bowl or served as a main meal packed with vegetables, grains or your choice of protein.
Read on for two quick and healthy ideas from Salad by Janneke Philippi.
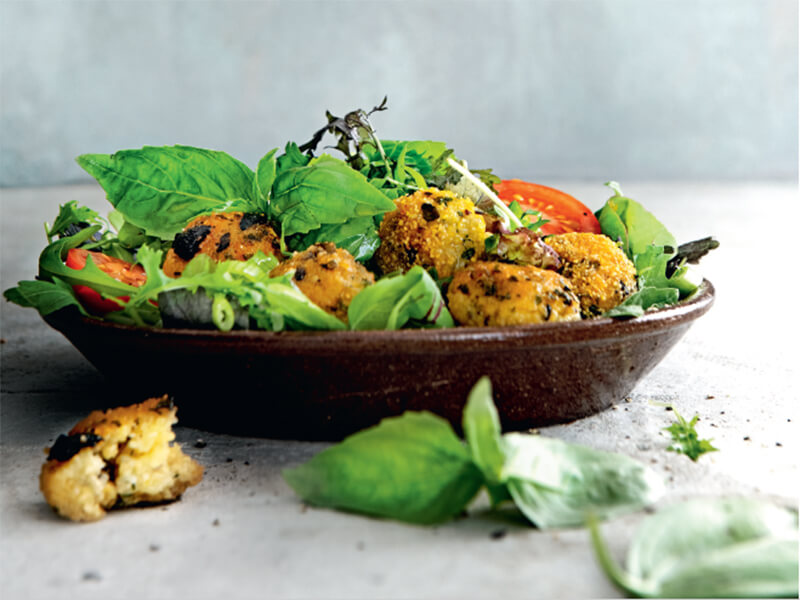
Basil salad with polenta balls
Golden yellow fried polenta balls, stuffed with olives and rocket (arugula), are the stars of this salad. Feel free to make them a few days in advance and keep them covered in the fridge.
Ingredients 125 g (41/2 oz) polenta 3 tablespoons pitted black olives handful of rocket (arugula) handful of grated parmesan 90 ml (3 fl oz) extra-virgin olive oil 6 small tomatoes 1 large bunch of basil 1 spring onion (scallion) 1 lemon olive oil, for frying handful of young lettuce leaves 1 tablespoon capers
Method Cook the polenta in 1 litre (34 fl oz) of water according to the packet instructions, until al dente. Roughly chop the olives and rocket. Mix the olives, rocket, parmesan and 2 tablespoons of the extra-virgin olive oil through the polenta. Leave the polenta to cool for 30 minutes. With wet hands, roll the polenta into 24 balls. Place on a tray and refrigerate for at least 3 hours until extra firm.
Halve the tomatoes. Pick the basil leaves and tear or roughly chop. Thinly slice the spring onion and cut the lemon into wedges.
Heat a generous amount of olive oil in a frying pan. Fry the polenta balls for 8–10 minutes, until golden brown all over; be careful as the hot oil will spit!
Mix the lettuce leaves with the basil, spring onion and capers. Divide the salad among four plates. Place the tomato on top of the salads and drizzle with the remaining extra-virgin olive oil.
Arrange the polenta balls over the salads and serve with the lemon wedges for a fresh accent.
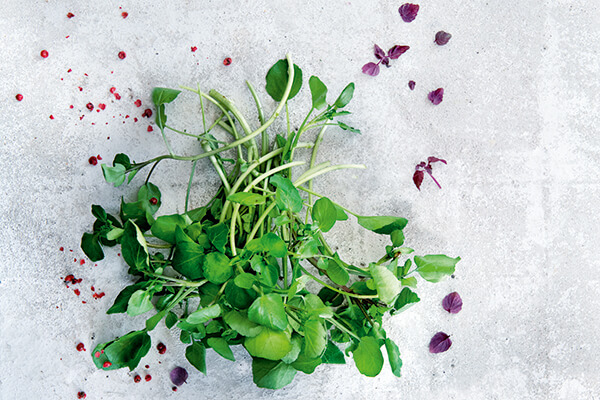
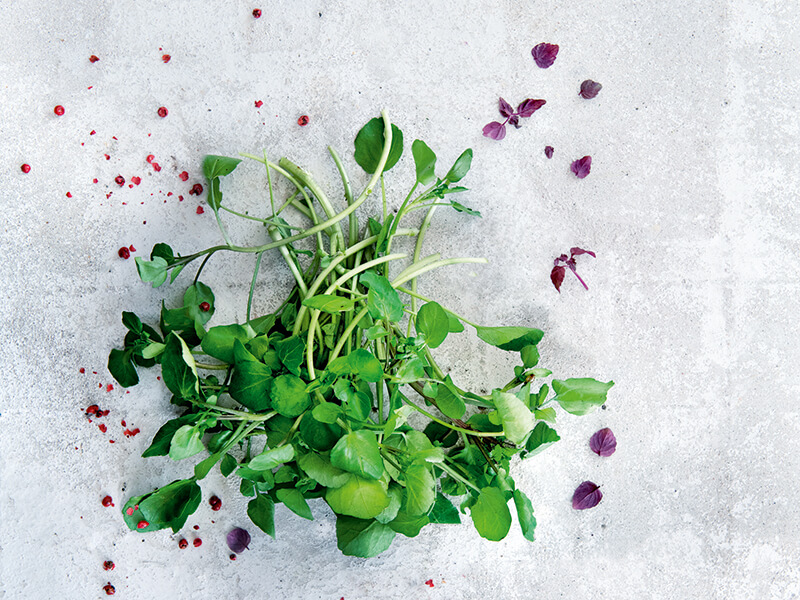
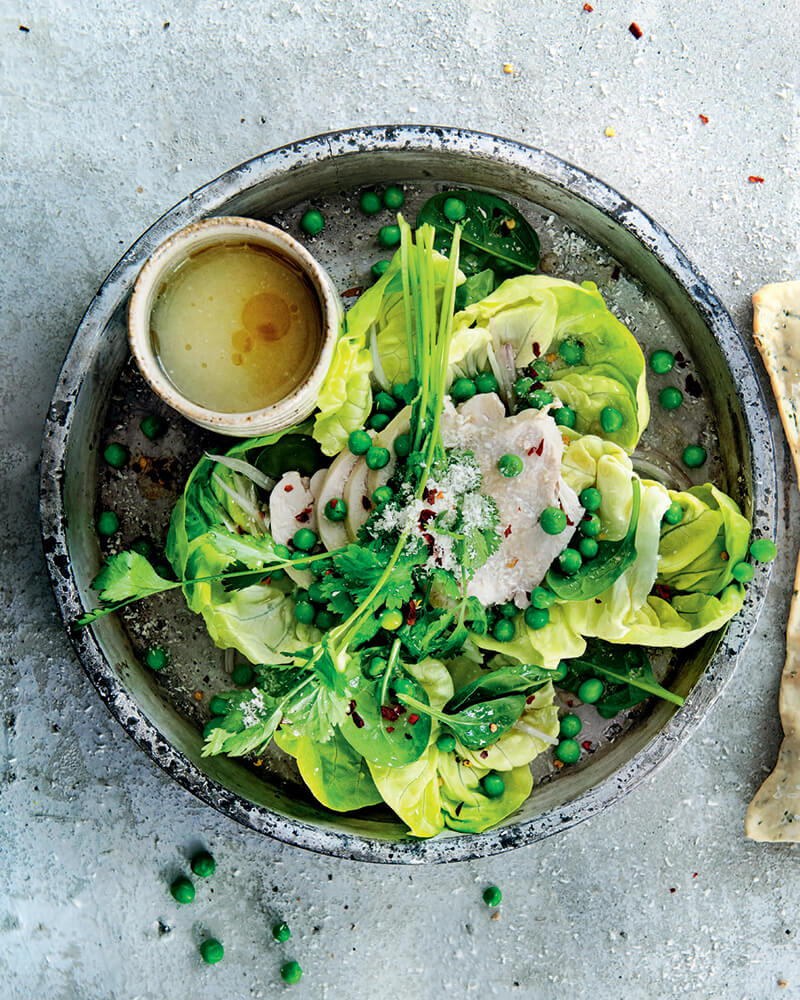
Spinach + Butter lettuce Salad with chicken poached in coconut milk
I like to make this salad in the spring and summer, when fresh young peas are sweet and crunchy. Poaching the chicken in coconut milk keeps the salad light and fragrant. You can serve the chicken warm over the salad or leave to cool in the poaching liquid so that the meat remains tender.
Image: Serge Philippi
Prep: 30 minutes + cooling
SERVES 4
Ingredients 400 ml (131/2 fl oz) tin coconut milk 1 chicken stock cube 500 g (1 lb 2 oz) boneless, skinless chicken breasts 1 lemongrass stalk 200 g (7 oz) fresh shelled peas 2 shallots 1 bunch of coriander (cilantro) 100 g (31/2 oz) butter (Boston) lettuce 100 g (31/2 oz) baby spinach 2–3 tablespoons sesame oil 2 tablespoons shredded coconut 1–2 teaspoons chilli flakes
Method Pour the coconut milk into a saucepan along with 400 ml (131/2 fl oz) of water, the stock cube and the chicken. Bruise the lemongrass stalk and add to the pan. Bring to the boil, then reduce the heat and gently poach the chicken for 15 minutes. Let the chicken cool in the poaching liquid to lukewarm or room temperature.
Cook the peas for 8 minutes, then drain and set aside to cool. Slice the shallot. Coarsely chop the coriander.
Arrange the butter lettuce leaves, spinach, shallot and peas on four plates. Slice the chicken (reserving the poaching liquid) and place on the salads with the coriander.
Strain the reserved poaching liquid and spoon it generously over the salads as a dressing. Drizzle with the sesame oil and sprinkle with the coconut and chilli flakes to taste.
Salad by Janneke Phillipi is available now. Photography by Serge Phillipi.
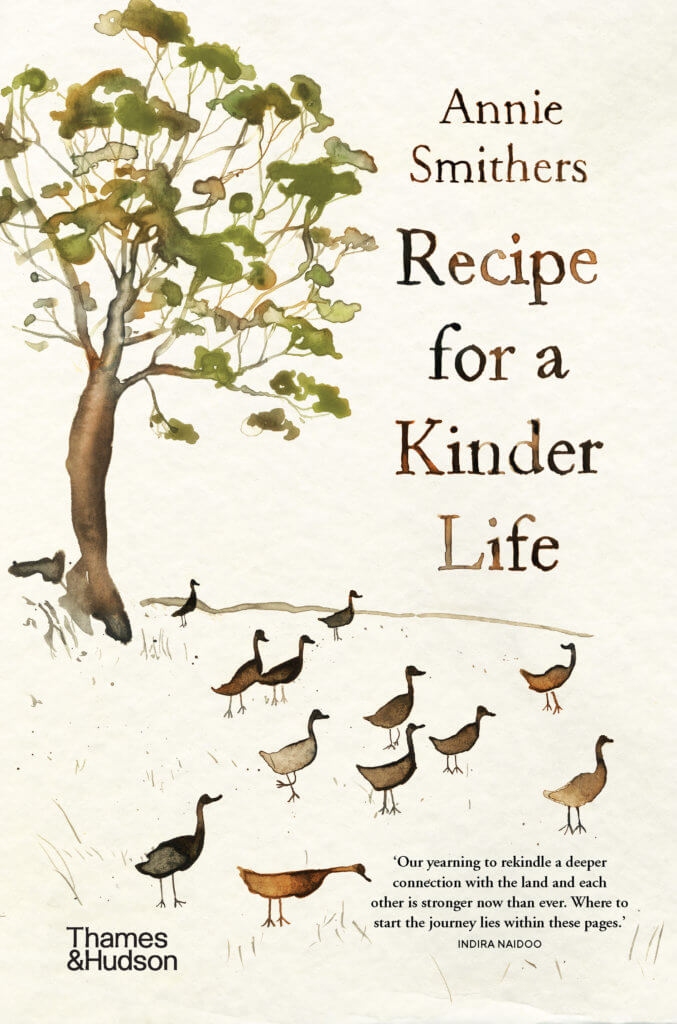
Annie Smithers, the inspired author of Recipe for a Kinder Life, knows how to cultivate a culinary experience that is the perfect marriage of exquisite fine dining and wholesome home cooking. Invite your loved ones round for this Du Fermier-inspired Christmas lunch, a mouth-watering Confit duck leg paired with salad dressed with fresh vinaigrette. It’s our chosen recipe for a kinder Christmas.
…
Illustration: Clare O’Flynn. Title: Daniel New.
…
Confit Duck Leg
I cook an enormous amount of duck at the restaurant. It delights me, in that I can use every skerrick of the gutted bird: rendering the fat, making sausages from the neck skin, using all the bones for stock, and treating the legs and the breasts to multiple cooking techniques. But my favourite is a good basic confit, where the leg has been salted and then cooked slowly in rendered fat – an age-old preservation technique from France. I love it served simply with sauteed potatoes, green beans and a sharply dressed salad.
Ingredients
4 duck legs
1 tbsp flaked salt
4 sprigs thyme
1 bay leaf
1 garlic clove, crushed
500 g rendered duck fat
Method
Lay the duck legs flesh side up in a non-reactive baking tray, either glass or stainless steel, and sprinkle with the salt, thyme, bay leaf and garlic. Cover with cling wrap and leave to marinate in the fridge overnight. The next day, rinse off and pat dry with a cloth. Preheat the oven to 140°C . Melt the duck fat over low heat. Place legs skin side up in a baking dish that has them very snugly packed, and cover with the melted fat. Place in the oven and cook for about 2½ hours until the duck legs are very tender. Remove from the oven, leave them to cool in their fat and refrigerate.
When you are ready to use the legs, either reheat in a non-stick pan over low heat till the flesh is warmed through and the skin crisp, or in an oven preheated to 190°C in a pan or baking dish.
…
Illustration: Daniel New
…
Simple vinaigrette
Ingredients
1 part sherry vinegar
1 part extra virgin olive oil
2 parts grape seed oil
Method
This is a dressing I use all year round; I do fiddle
with it at times, though. If I have a salad that incorporates walnuts, I swap
out the olive oil for walnut oil; if I’m using hazelnuts, I’ll do the same
substitution but with hazelnut. To make a creamier-style dressing that is
lighter than mayonnaise, I whisk some of my sherry vinaigrette through sour
cream or thickened cream. This is delicious on a salad made from a whole butter
lettuce, sprinkled with snipped fine herbs. My salad leaves also get used in
some substantial meat-based salads – I make a delicious warm sausage salad, for
example. Leaves of the bigger variety get paired with pan-fried slices of
Toulouse sausage, pan-fried potatoes and bacon, fresh tomatoes and sourdough croutes.
For this salad, I use a lovely Dijon dressing, which I make by whisking in a
slosh of vinegar to a big spoonful of mustard, and then whisking in grape seed
oil until it thickens.
Salad leaves are for all year round, in my book. Dressings can come and go and change with the seasons, but one of the things many of the restaurant customers say is that they can’t believe how delicious our lettuces are. It always reminds me that a well-grown lettuce, picked freshly and dressed pleasantly, can be something worth remembering.
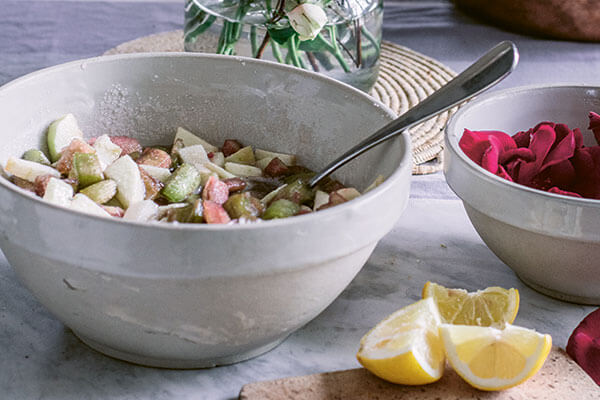
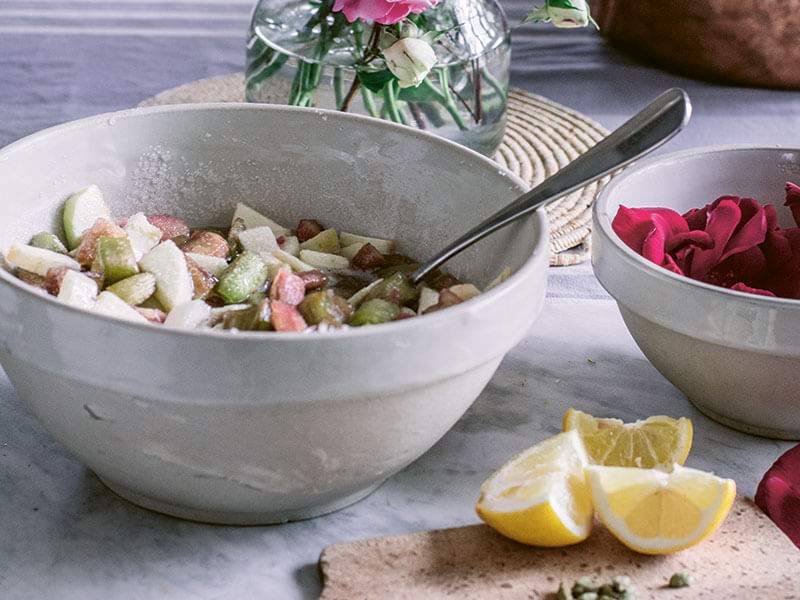
Sara Silm’s How to French Country transports you to this unique corner of the world that is Southwest France through the lens of colour, texture and tantalising flavour. Her recipes are one of a kind and arranged by season, including this delightful recipe for Rose Petal and Rhubarb Jam.
Photography: Sara Silm
This jam, inspired by the fabulous Diana Henry, is one I make in spring, when the first of my roses are in flower and the new season’s rhubarb is just emerging from its winter slumber. I always have loads of jam jars on hand, usually 324 milliliter Le Parfait pots à confiture. I use a large traditional copper jam pan; a gift from an old friend when I lived in Moscow. As with all jams, it’s important to let the fruit macerate with the sugar overnight, or for at least 12 hours in advance of cooking. If you’re using a copper jam pan, this maceration process is also essential in order to avoid the fruit acids coming into direct contact with the copper. This jam is beautiful with a slice of toasted brioche (or on scones with lashings of whipped cream).
Makes 3kg
Ingredients
2 kg rhubarb (roughly 2 bunches), cut into 1¼-cm pieces
5 cups (1.1 kg) jam sugar (or 5 cups caster sugar with 14 g pectin added)
2 Granny Smith apples, finely chopped
1 lemon, juiced
6 cardamom pods, bruised
2 cups rose petals, bases trimmed
1 teaspoon rose water (if you don’t have any rose petals, you can double the amount of rose water)
Photography: Sara Silm
Method
Place the chopped rhubarb, sugar and apples in a large bowl and mix well. Leave to macerate overnight or for at least 12 hours (cover with a clean tea towel).
Pour the fruit into a copper jam pan, or a heavy-bottomed Dutch oven, and bring it slowly to the boil, skimming off any scum that rises to the surface. Add the lemon juice and cardamom and continue boiling until the mixture reaches 105 °C on a sugar thermometer, or until a small amount wrinkles when pushed on a cold plate (place the plate in the freezer in advance). This stage is usually reached after 15–20 minutes of boiling. Allow the jam to sit for 5–10 minutes, then stir in the rose petals and rose water. Ladle into sterilised jam jars.
How to French Country is available now. Text and photography by Sara Silm and design by Daniel New.
Did you know that medicinal plants can work wonders for your emotional health? In her revolutionary new guide The Plant Clinic, Erin Lovell Verinder says that ‘plants have a phenomenal ability to adapt their medicinal offerings to the needs of the people. They hold space for our process, bringing ease and comfort, lifting the proverbial storm clouds within us, calming the nervous system and assuring us with a warm embrace.’
Read on for three of Erin’s incredible recipes to help support your journey to better mental health and wellbeing.
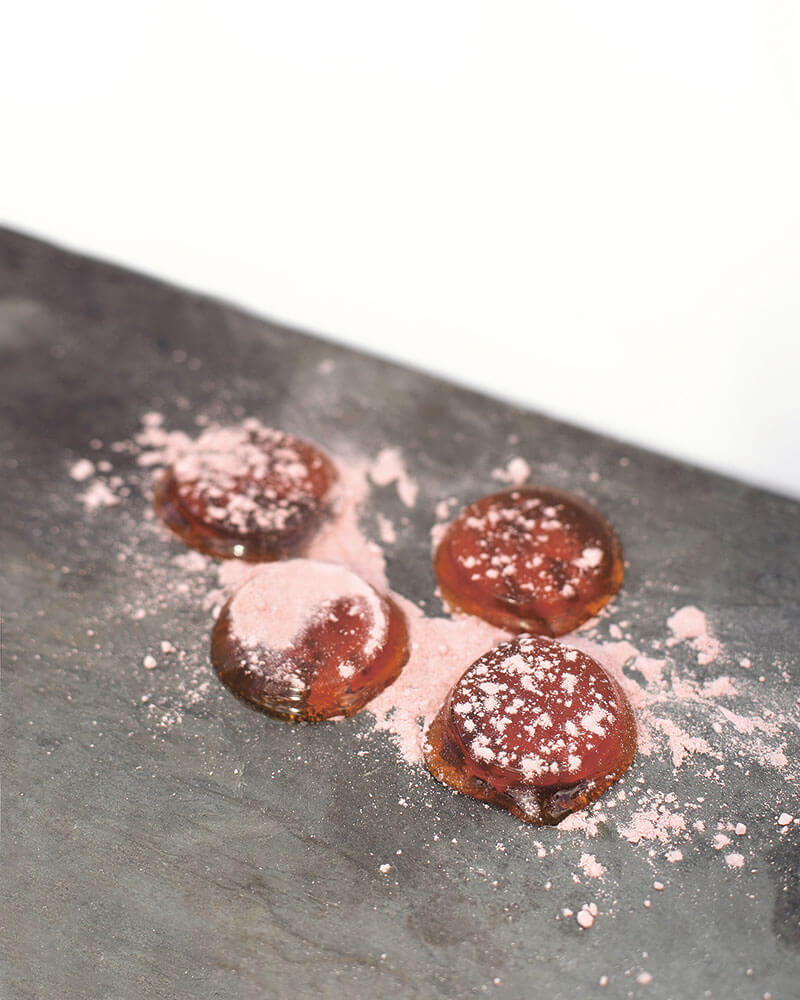
Calm Candies
Who doesn’t love candy? These rose-dusted, ‘clean’ candies, infused with a synergistic quintet of calming plants, are sweetened only with honey. They are always a hit with the kids. Savour these nectarous, golden-hued jewels, to bring on an instant dose of peacefulness.
Photography: Georgia Blackie
Herbal Ingredients
2 teaspoons dried passionflower leaf
2 teaspoons dried lemon balm leaf
2 teaspoons dried chamomile flowers
2 teaspoons dried skullcap leaf
rose petal powder (to dust)
Method
First, make 1/4 cup of strong medicinal tea infusion with the herbal ingredients, brewing the tea for at least 20 minutes before straining through a fine-mesh sieve. Add the infused tea base and 1 cup of honey to a heavy-bottomed saucepan and simmer over medium to high heat. It’s best to use a candy thermometer here, as the mix needs to get to around 150°C (300°F). This will take around 25–30 minutes. If you do not have a thermometer, you can test if the candy is ready by dropping a little of the mixture into ice cold water. If the mixture is ready, it will harden instantly! Do be very careful, though, as hot sugar burns can be very serious and very sore.
Once ready, pour your candy mixture into small silicon moulds (any mould will do, but the candies are much easier to remove from silicon) and allow to cool completely. Remove from the moulds and dust with your herbal powder of choice (such as the rose petal powder in the Calm Candies remedy recipe, p. 278). You can roll each candy in baking paper for freshness and portability, or store sealed in an airtight container for 2–4 weeks. If you live in a warmer climate, keep these in the fridge!
Floral Bath
Sometimes the simplest interventions feel entirely luxurious, and this herbal practice is one of them. Floating in a bath of warm water scattered with precious petals is a treat for the mind, body and spirit. This remedy is perfect for when you may be feeling weary, fatigued, compressed, low and a little lacklustre. When choosing the floral plant portion of the recipe, consider aromatic herbs such as lavender and rose to inspire relaxation and rejuvenation.
Photography: Georgia Blackie
Herbal Ingredients
1/2 – 1 cup fresh or dried medicinal flowers (e.g. lavender, calendula, chamomile, rose and rosemary)
Method
Mix the flowers and plant material directly into the running bath water – they will float and bob around merrily.
Soak up the serenity for 20 or so minutes.
Lion’s Mane Tonic
For those sluggish mornings or slumpy afternoons where you might find yourself in the thick of fogginess and in need of motivation. This warming blend lights up neurological powers and vitality – in part due to the awesomeness of the medicinal mushroom, lion’s mane, which is paired with chai spice tones and adaptogenic maca root. Implement this sustaining treat to renew your capacity for focused endurance.
Photography: Georgia Blackie
Herbal Ingredients
1 teaspoon lion’s mane mushroom powder
1 teaspoon cinnamon powder
1/2 teaspoon cardamom powder
1/2 teaspoon ginger rhizome powder
1/4 teaspoon maca root powder
1/2 teaspoon lucuma powder
a pinch of ground black pepper
a dash of raw honey or sweetener of choice
Method
To make a warm mylk tonic, add the herbal ingredients and 1 cup plant mylk together in a milk frother and set to ‘warm’, or heat gently in a saucepan. If adding raw honey as a sweetener, ensure that your tonic is not boiling hot, as excess heat will degrade the honey’s beneficial enzymes. Once warm, pour into your favourite mug, dust with a little cinnamon, sip slowly and savour the warmth.
To make a cold mylk tonic, add the herbal ingredients and 1 cup plant mylk together in a milk frother set to ‘cool’, or blitz in a blender. Then simply pour into a tall glass over ice, sprinkle with edible petals and enjoy.
The Plant Clinic is available now. Text by Erin Lovell Verinder, photography by Georgia Blackie and design by Noah Harper Checkle.
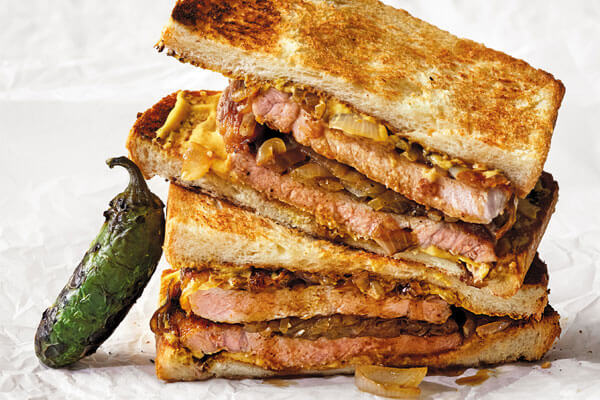
In his second cookbook, one of our favourite chefs Matty Matheson opens up his home and shares his approachable style of cooking. Get a taste of the bold and beautiful dishes Matty serves up in Matty Matheson: Home Style Cookery with these recipes for his Chicago-Style Pork Chop Sandwich and Green Curry Beef Ribs.
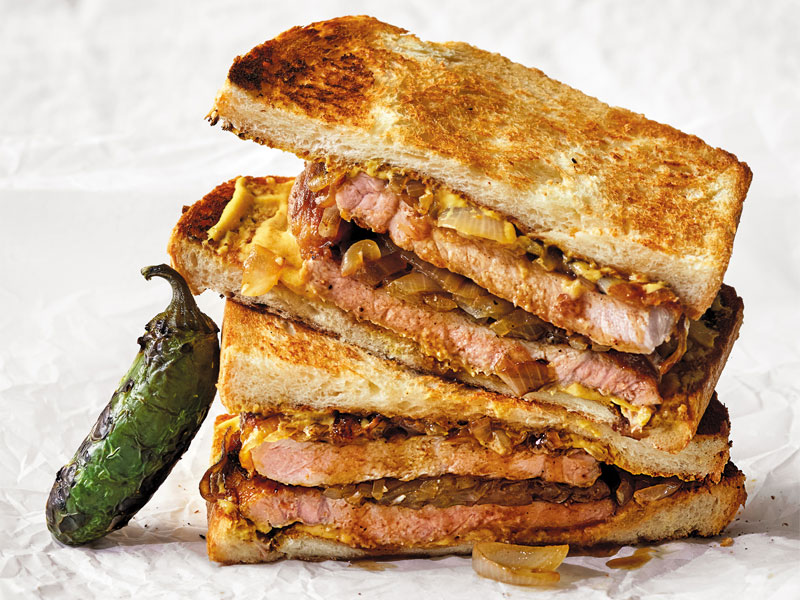
Chicago-Style Pork Chop Sandwich
Serves 2
Prep time: 15 minutes
Half of these sandwiches are inspired by my trips to Chicago, it seems, and this pork chop is a perfect piece of history. A bone-in pork chop sandwich may seem weird or even troublesome, but I feel it’s a challenge and I’m always up for it. Whenever I go to get one of these, I can smell the onions from down the street—piles of caramelized onions covering seared pork chops, keeping them warm like the belly of a mama bear. I love the kind of spots that can hand you a sandwich in less than a minute flat, and the whole family instantly has food that’s eaten on the hood of the car, eating and chewing away at an American classic that now can be made at home. You could buy good pork, maybe, or buy those frozen bone-in quarter-inch-thick guys that we all remember growing up.
Photography: Quentin Bacon
Ingredients:
2 bone-in pork chops (the thinnest pork chops available, about 115 g per chop)
1 teaspoon kosher salt, plus more for the onion
1 teaspoon freshly ground black pepper
2 tablespoons vegetable oil
1 white onion, julienned
4 slices toast
2 tablespoons yellow mustard
2 pickled jalapeño chiles
Directions:
Season the pork chops with the salt and pepper.
Heat the vegetable oil in a large cast-iron skillet over high heat. Once the oil is smoking hot, add the pork chops and sear hard on the first side, about 2 minutes. Flip and repeat on the other side. Take out of the skillet and rest on wire rack.
Heat the vegetable oil in the hot pan. Throw the onion into the pan, stir it up, and hard-sear for 2 to 3 minutes. Put a lid on the pan and let the onion steam for a minute. You want those onions a little caramelized and burnt. Season with salt. Remove from heat and let rest.
Spread 1 tablespoon of the mustard on one side of both the top and bottom pieces of toast. Place the pork chops on the bottom toast, cover with onions, and finish with the top toast, mustard side down. Serve with a pickled jalapeño.
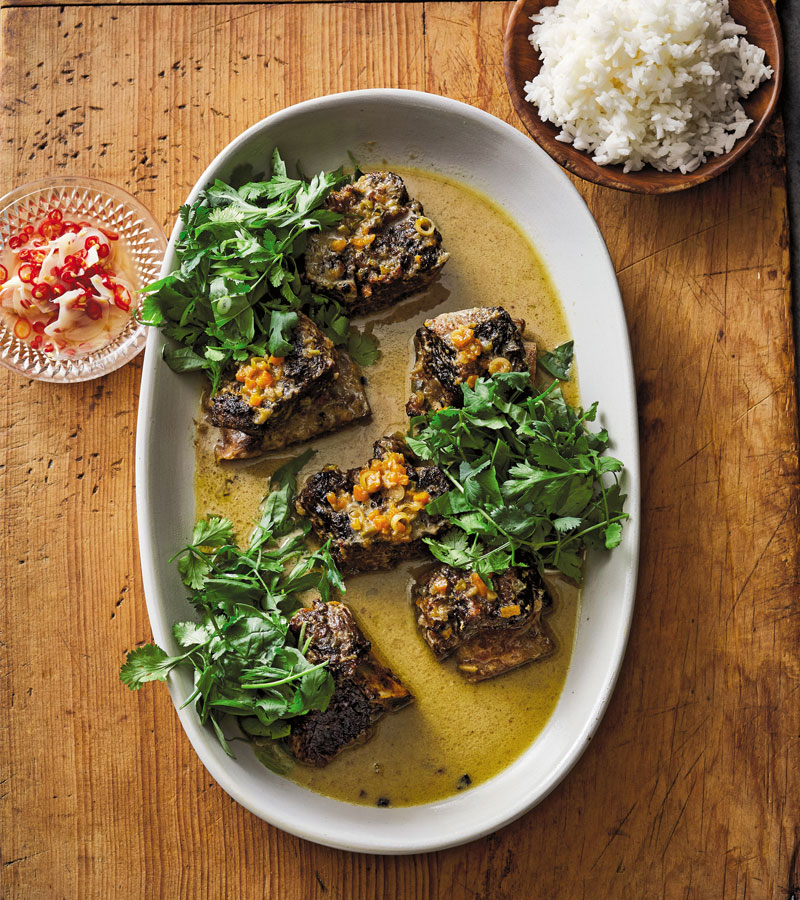
Green Curry Beef Ribs
Serves 4 to 6
Prep time: 3 hours
Meat and rice is the new meat and potatoes. And braised beef ribs in spicy green curry is great for any meal— breakfast, lunch, or dinner. Real flavor-building, real spice, real tasty meals for the whole family. Building your skills and your palates are very important to keep things exciting in your home life. And guess what, the day after, shred this beef and make little rotis; add some cheese, even. Fuck this shit up.
Photography: Quentin Bacon
Ingredients:
For the beef short ribs:
2 kg beef short ribs, meat removed from the bone and cut into 4 cm cubes
1 teaspoon kosher salt, plus more as needed
1 teaspoon freshly cracked black pepper
2 tablespoons vegetable oil
1 cup (200 g) diced onion
2⁄3 cup (100 g) diced celery
2 tablespoons sliced garlic
1⁄4 cup (75 g) seeded and diced jalapeño chile
1⁄2 cup (100 g) diced leek, white and green parts only
2 stalks lemongrass, cut in half and smashed with the side of a knife
1 tablespoon grated ginger
1 tablespoon green curry paste
1 tablespoon ground Thai spice (equal parts toasted ground cardamom and toasted ground cumin)
4 cups (880 ml) Beef and Bone Marrow Stock (page 55), or store-bought
1 cup (240 ml) canned unsweetened coconut milk
2 tablespoons lime juice
For the pickled garlic:
4 garlic cloves, sliced
paper-thin
2 bird’s eye chiles, sliced
2 tablespoons white vinegar
For serving:
1⁄3 cup (30 g) sliced scallions
1½ cups (60 g) cilantro leaves,
stems diced
Steamed jasmine rice, or
Grilled Naan (page 30)
Directions:
Make the short beef ribs:
Season the short ribs with the salt and pepper. Heat the vegetable oil in a
medium Dutch oven over medium-high heat. Working in 2 batches, brown the short
ribs on all sides, about 8 minutes per batch. Transfer the short ribs to a
plate and pour out about 70 percent of the fat from the pot.
Add the onion, celery, garlic,
jalapeño, leek, and lemongrass to the pot; cook, stirring occasionally, until
the onion starts to brown, about 10 minutes. Add the ginger, curry paste, and
toasted spice mix and stir to coat the vegetables. Add the short ribs and any
juices from the resting plate. Add beef stock to barely cover the top of the
short ribs. Bring to a boil, then turn down heat to low; simmer until the short
ribs are tender, 2 to 2½ hours. Remove the lemongrass and whisk in the coconut
milk. Taste the broth for seasoning. Add the lime juice and salt as needed.
While the beef is cooking, make
the pickled garlic: In a small nonreactive bowl, combine the garlic and chiles.
Heat the vinegar in a small skillet until bubbling. Pour the hot vinegar over
the garlic and chiles and let sit for 1 hour.
To serve: Generously divide the
curry into serving bowls. Garnish the bowls with little spoonfuls of pickled
garlic and lots of chopped scallion and cilantro leaves. Enjoy with jasmine
rice or a big piece of grilled naan.
This is an edited extract from Matty Matheson: Home Style Cookery, out now. Text by Matty Matheson with photography by Quentin Bacon. Originally published by Abrams Books.
There’s no better time to settle in to the ultimate, feel-good luxury of making homemade bread, and this Speckled Beetroot Sourdough is worth settling in to.
Whilst all the recipes in How to Raise a Loaf are suitable for beginners, this recipe should be attempted once you’ve already made your first basic loaf. The recipe for a basic loaf, as well as kneading and folding tutorials, are all included in How to Raise a Loaf. You’ll also find a step-by-step guide to making and using your starter. Head over to Laurence King’s Instagram story here to watch how we make our starter.
Speckled Beetroot Sourdough
With a distinctive appearance and earthy aroma, this is a real show-stopper, and a perfect, hearty accompaniment to winter soups or stews. Beetroots are a rich source of antioxidants, and also give the dough an unforgettable pink colour, which fades in the oven, leaving speckles in a classic open crumb.
Photography by Ida Riveros
Ingredients
· 200g starter · 10ml (2 tsp) olive oil · 180ml warm water · 340g strong white bread flour · 7.5g (1½ tsp) fine salt · 150g fresh beetroot, peeled and coarsely grated · rice flour or semolina, for dusting
1. In a large mixing bowl, whisk the starter, olive oil and warm water together until the starter has dissolved.
Photography by Ida Riveros
2. In another bowl, mix the flour with the salt. Add this to the wet mixture and mix well with your hand, then add the grated beetroot and mix until the beetroot is evenly distributed. Cover the bowl with a tea towel and leave to rest for 30 minutes.
3. Wet your hands, then pull, fold and rotate the dough 8—10 times, so that it forms a ball. Leave to rest for 10 minutes.
4. Repeat Step 3 twice so that you’ve worked the dough three times and it has rested for a hour in total.
5. Dust a proving basket liberally with rice flour or semolina. Wet your fingers, work them around the bottom of the ball of dough and gently transfer it to the proving basket, keeping the seam upwards.
6. Cover with a tea towel and leave in a warm place to prove. Depending on the temperature and the activity of the yeast, it may take three to six hours to gain about 50 per cent in size.
Photography by Ida Riveros
7. When the loaf has proved, preheat the oven to 230°C (210°C fan)/gas mark 8, with a heavy baking tray or baking stone on the middle shelf, and add a source of steam. Turn the loaf out of the proving basket onto the heated surface, cut it twice across the top with a sharp blade or scissors, then place it in the oven.
8. Bake for 10 minutes, then reduce the temperature to 210°C (190°C fan)/gas mark and bake for another 40 minutes, or until the loaf is done and sounds hollow on the base when tapped with a fingertip.
9. Leave to cool on a wire rack before eating.
Photography by Ida Riveros
This is a recipe extract from How to Raise a Loaf, published by Laurence King Publishing, $25, available here.